

Hello! I have not posted in some time, but I have always enjoyed recapping our projects on this blog, especially the big ones, like our kitchen refresh project. It has been a few years now since we started this one, but better late than never.
When we bought our home in New Hampshire in Spring 2021, we were living with my in-laws. While we hoped to move in our home as soon as possible after closing, we also had an opportunity to make some updates before we needed to move in. We took that opportunity to put a fresh coat of paint on the walls, refinish the hardwood floors downstairs, and replace the carpeting upstairs.

But, the biggest DIY project for us was painting the stained wood cabinets white. The existing solid wood shaker cabinets and molding were in great shape. They were not original to the house, but were installed within the past 20 years. We really like the cabinets, and felt like painting them would instantly upgrade the kitchen. I also love stained wood cabinets, but I have wanted a white kitchen for years at this point and there was no stopping me :). We also felt lucky that the granite countertops are primarily black. The style is busier than the counters we chose for our last home, but certainly good enough for us.

We are not new to painting, but kitchen cabinet painting was a first. If you have ever considered this type of project and started researching how to paint cabinets, you may already know that the internet offers numerous options for the best way to paint cabinets. I am certain ours was not the best way, but it was a good enough way that ultimately worked for us!

I found a Facebook group called “CABINET PAINTING & REFINISHING – “Where DIY & Professionals Come Together.” I highly recommend joining this group if you want to have access to tips and instructions from professional painters. We used DIY steps that we found through that Facebook group, with a little experimenting here and there.
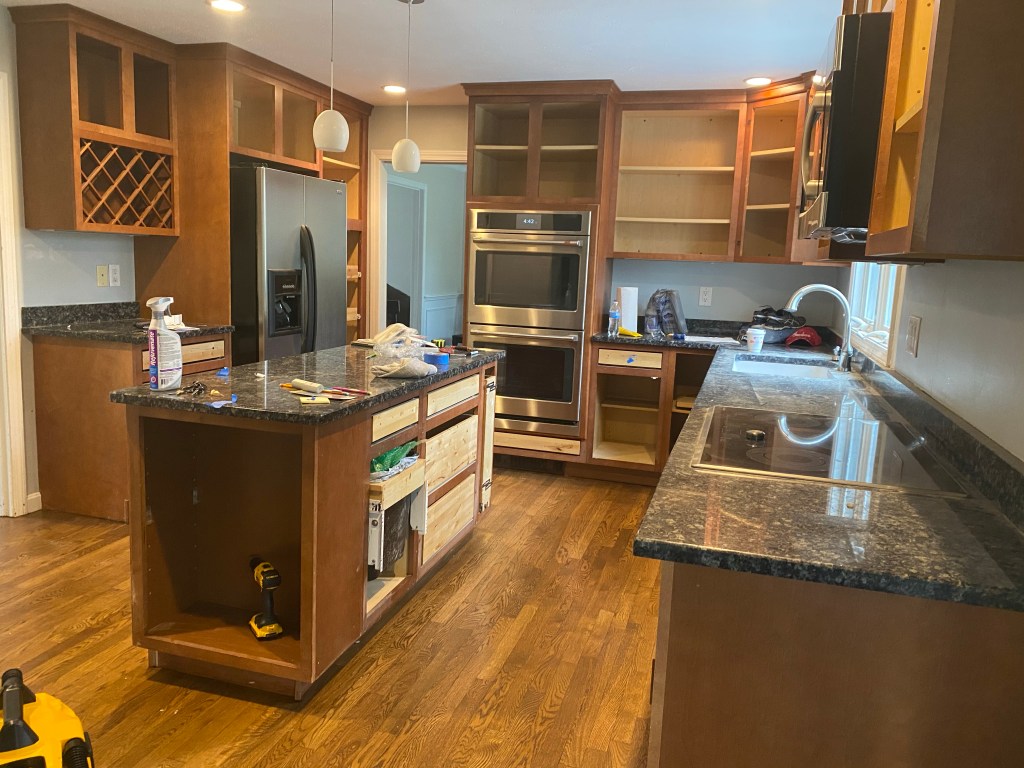
First, we removed all cabinet doors to paint in a different space, taped all openings to the cabinets and along fixtures, and taped down contractor paper on the floors.

Next, we thoroughly washed and prepped the cabinet doors and cabinet bases with soap and water and degreaser where necessary and then sanded lightly with a fine grit (150, then 220). We wiped them clean with microfiber rags to remove dust.
You will see in the picture below that we accidentally over-sanded some of the base cabinets before realizing that they just needed a fine grit sanding. Whoops!

Next, was primer. We used Zinsser BIN primer (link here if interested). For the cabinet bases, we applied the first coat of primer with 2″ Zibra angle brushes (link here) and the Whizz brand cabinet flock roller. Both were highly recommended by the professionals. We waited 48 hours then sanded again with a fine grit (220), wiped clean, and primed again the same way, sanding after with a fine grit (220, then 320).

However, for the doors, we were losing steam quickly (I haven’t mentioned this yet, but with full time jobs and two young kids at home, the project was dragging on quite a bit!!). We started in early May and did not complete it all until early August.

After realizing priming and painting the doors by hand might take until our now-toddlers graduated high school, we decided to use a sprayer. This method was not recommended for DIY from the Facebook group, but we decided to give it a shot. We actually used a hobby paint sprayer that had great reviews. We used the Critter – probably the cheapest air sprayer around, and surely not made for professional cabinet painting. In fact, the Critter uses actual mason jars to hold the paint, which makes it very easy to refill and clean.
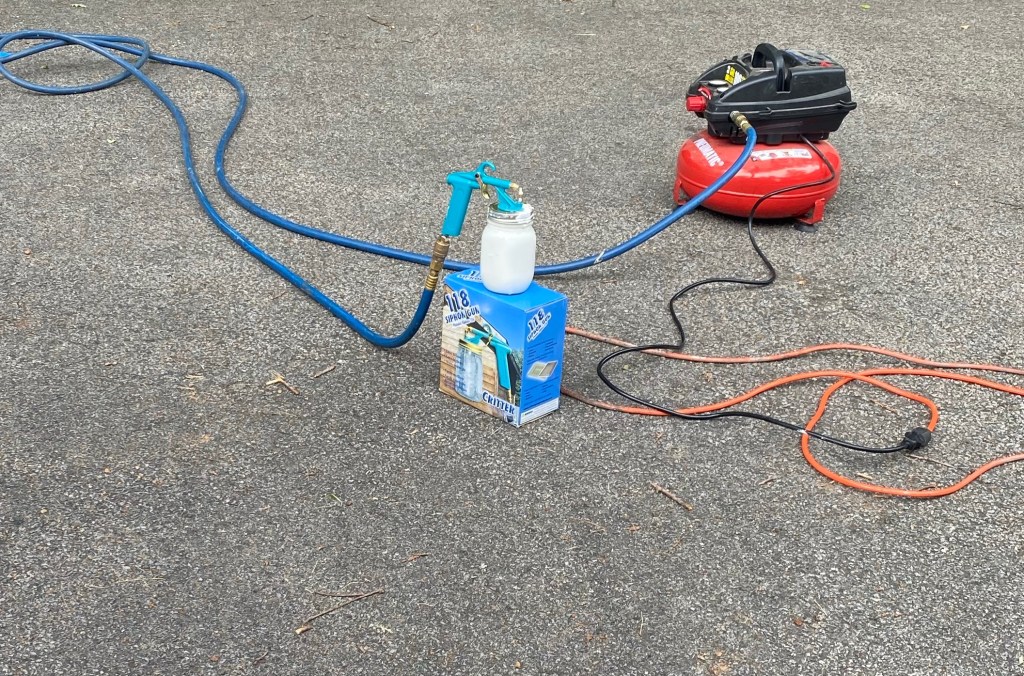
We experimented on one door for the right coverage. It ended up working well, just taking time and patience, so we did it for the second coat of primer for most of the doors, and a first coat for some of the doors we hadn’t touched yet. We sanded lightly between coats. Painting with the Critter was a breeze and went quickly. We were able to do a coat on all cabinets in under 30 minutes.

For cabinet paint, we discovered the Italian brand Milesi through the Facebook group I mentioned above. Milesi’s 2k cabinet paint can be painted on by brush, and it cures more quickly than the brands available at big box stores, providing a factory finish. We purchased Milesi 2k through a distributor I found in the group, and paid around $300 total. The Milesi website is a bit rudimentary but also allows you to locate local distributors if you are interested in using this product. We had our paint tinted to match Benjamin Moore White Dove and chose the “20” sheen (less shiny than the “30”).

For the cabinet bases, we painted and brushed on just as we did for the primer. For the doors, we sprayed using the Critter, sanding lightly between coats. These little painting tents helped us keep the cabinets raised and prevented them from sticking to the table (link if interested).

No topcoat finish is needed with Milesi, so after two coats, once we felt the cabinets were fully covered, we were done! We are very happy with the end result. There are some imperfections because we aren’t professionals, but taking the time to follow the above steps did render good results. We were very impressed by Milesi’s smooth cured finish.


So, how has it held up, two years out? Pretty good, with some caveats. The bases look fantastic, as do most of the doors. However, the seams on some of the doors have chipping. I believe this is due to a few things. First, we may not have degreased enough or sanded enough in those seams. Second, we should have probably used a wood filler on the seams. In addition, it is possible that the BIN primer was brittle/temperamental. I have heard that applying Stix primer first and then BIN decreases that risk. Lastly, it could have been a user error — we did use a hobby paint sprayer after all. We are not too concerned about it, and we touch them up as needed with our leftover cabinet paint, but I did want to point out that our method was not perfect in that regard.
Thanks for following along!

Great job on the cabinets! It’s awesome to see the transformation and hear about what worked (and what didn’t). Super inspiring!”
LikeLike