

Earlier this year, I shared our plans to complete a small remodel of our first floor powder bathroom and laundry space that is immediately off the kitchen.
Coming from the Midwest, this type of combo room was not at all typical. However, in New Hampshire, almost everyone I know has a bathroom laundry combination on the first floor. Who knew? This is a tiny room, but it is used constantly and highly visible. I am happy to say that the project is mostly complete, with only a few small tasks remaining.
Now, the fun part of sharing the updates! Here is the before and after:

Rewinding a bit, I’d like to walk through the changes. Grab your coffee, because there are quite a few to cover!
The most impactful change was removing the damaged tile. We learned that one of the previous home owners had installed the tile over the prior flooring, and unfortunately the subfloor below was not nearly as thick as it should have been. This was a much-needed fix to structurally repair the room.

We used a 12×24 natural black slate tile by MSI with mapei charcoal grout. I absolutely love the warmth and natural look and feel of the slate tile, and I am relieved that the floor is now structurally okay.
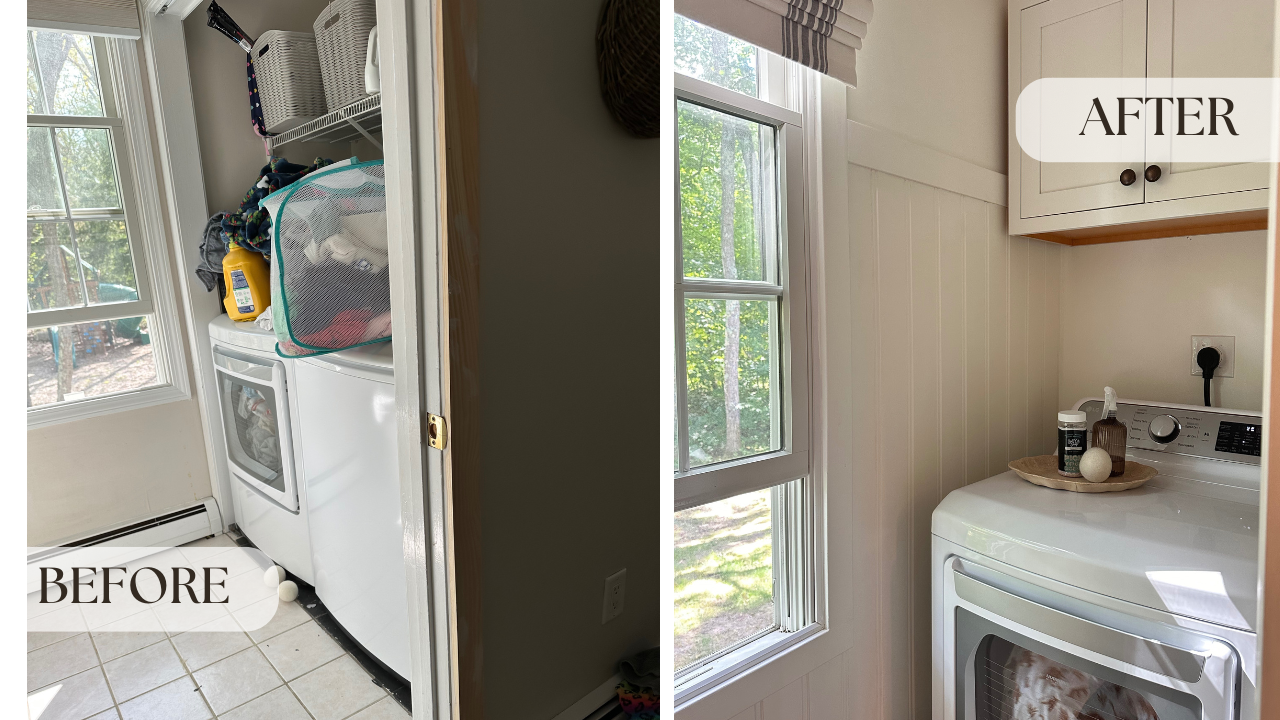
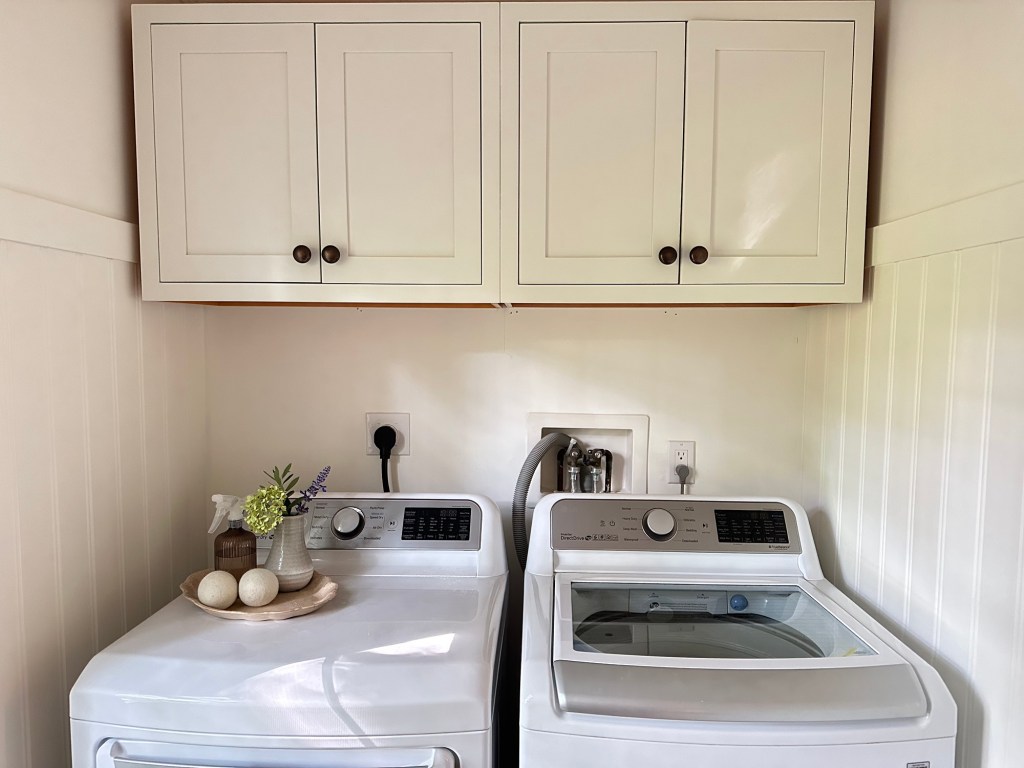
Another impactful change was removing the closet door surround. Years ago, previous owners must have had a small washer and dryer set that fit behind a closet door. I actually would have loved to hide the washer and dryer behind closet doors. However, the closet was simply too shallow and the room is too small to accommodate that unless we downgraded appliances.

Practically speaking, we do too much laundry for that to work for our family. We would have had to find a compact stacking set, and I was not willing to give up our standard size set and functionality. So, we leaned into it and removed the closet trim, which was non-structural.
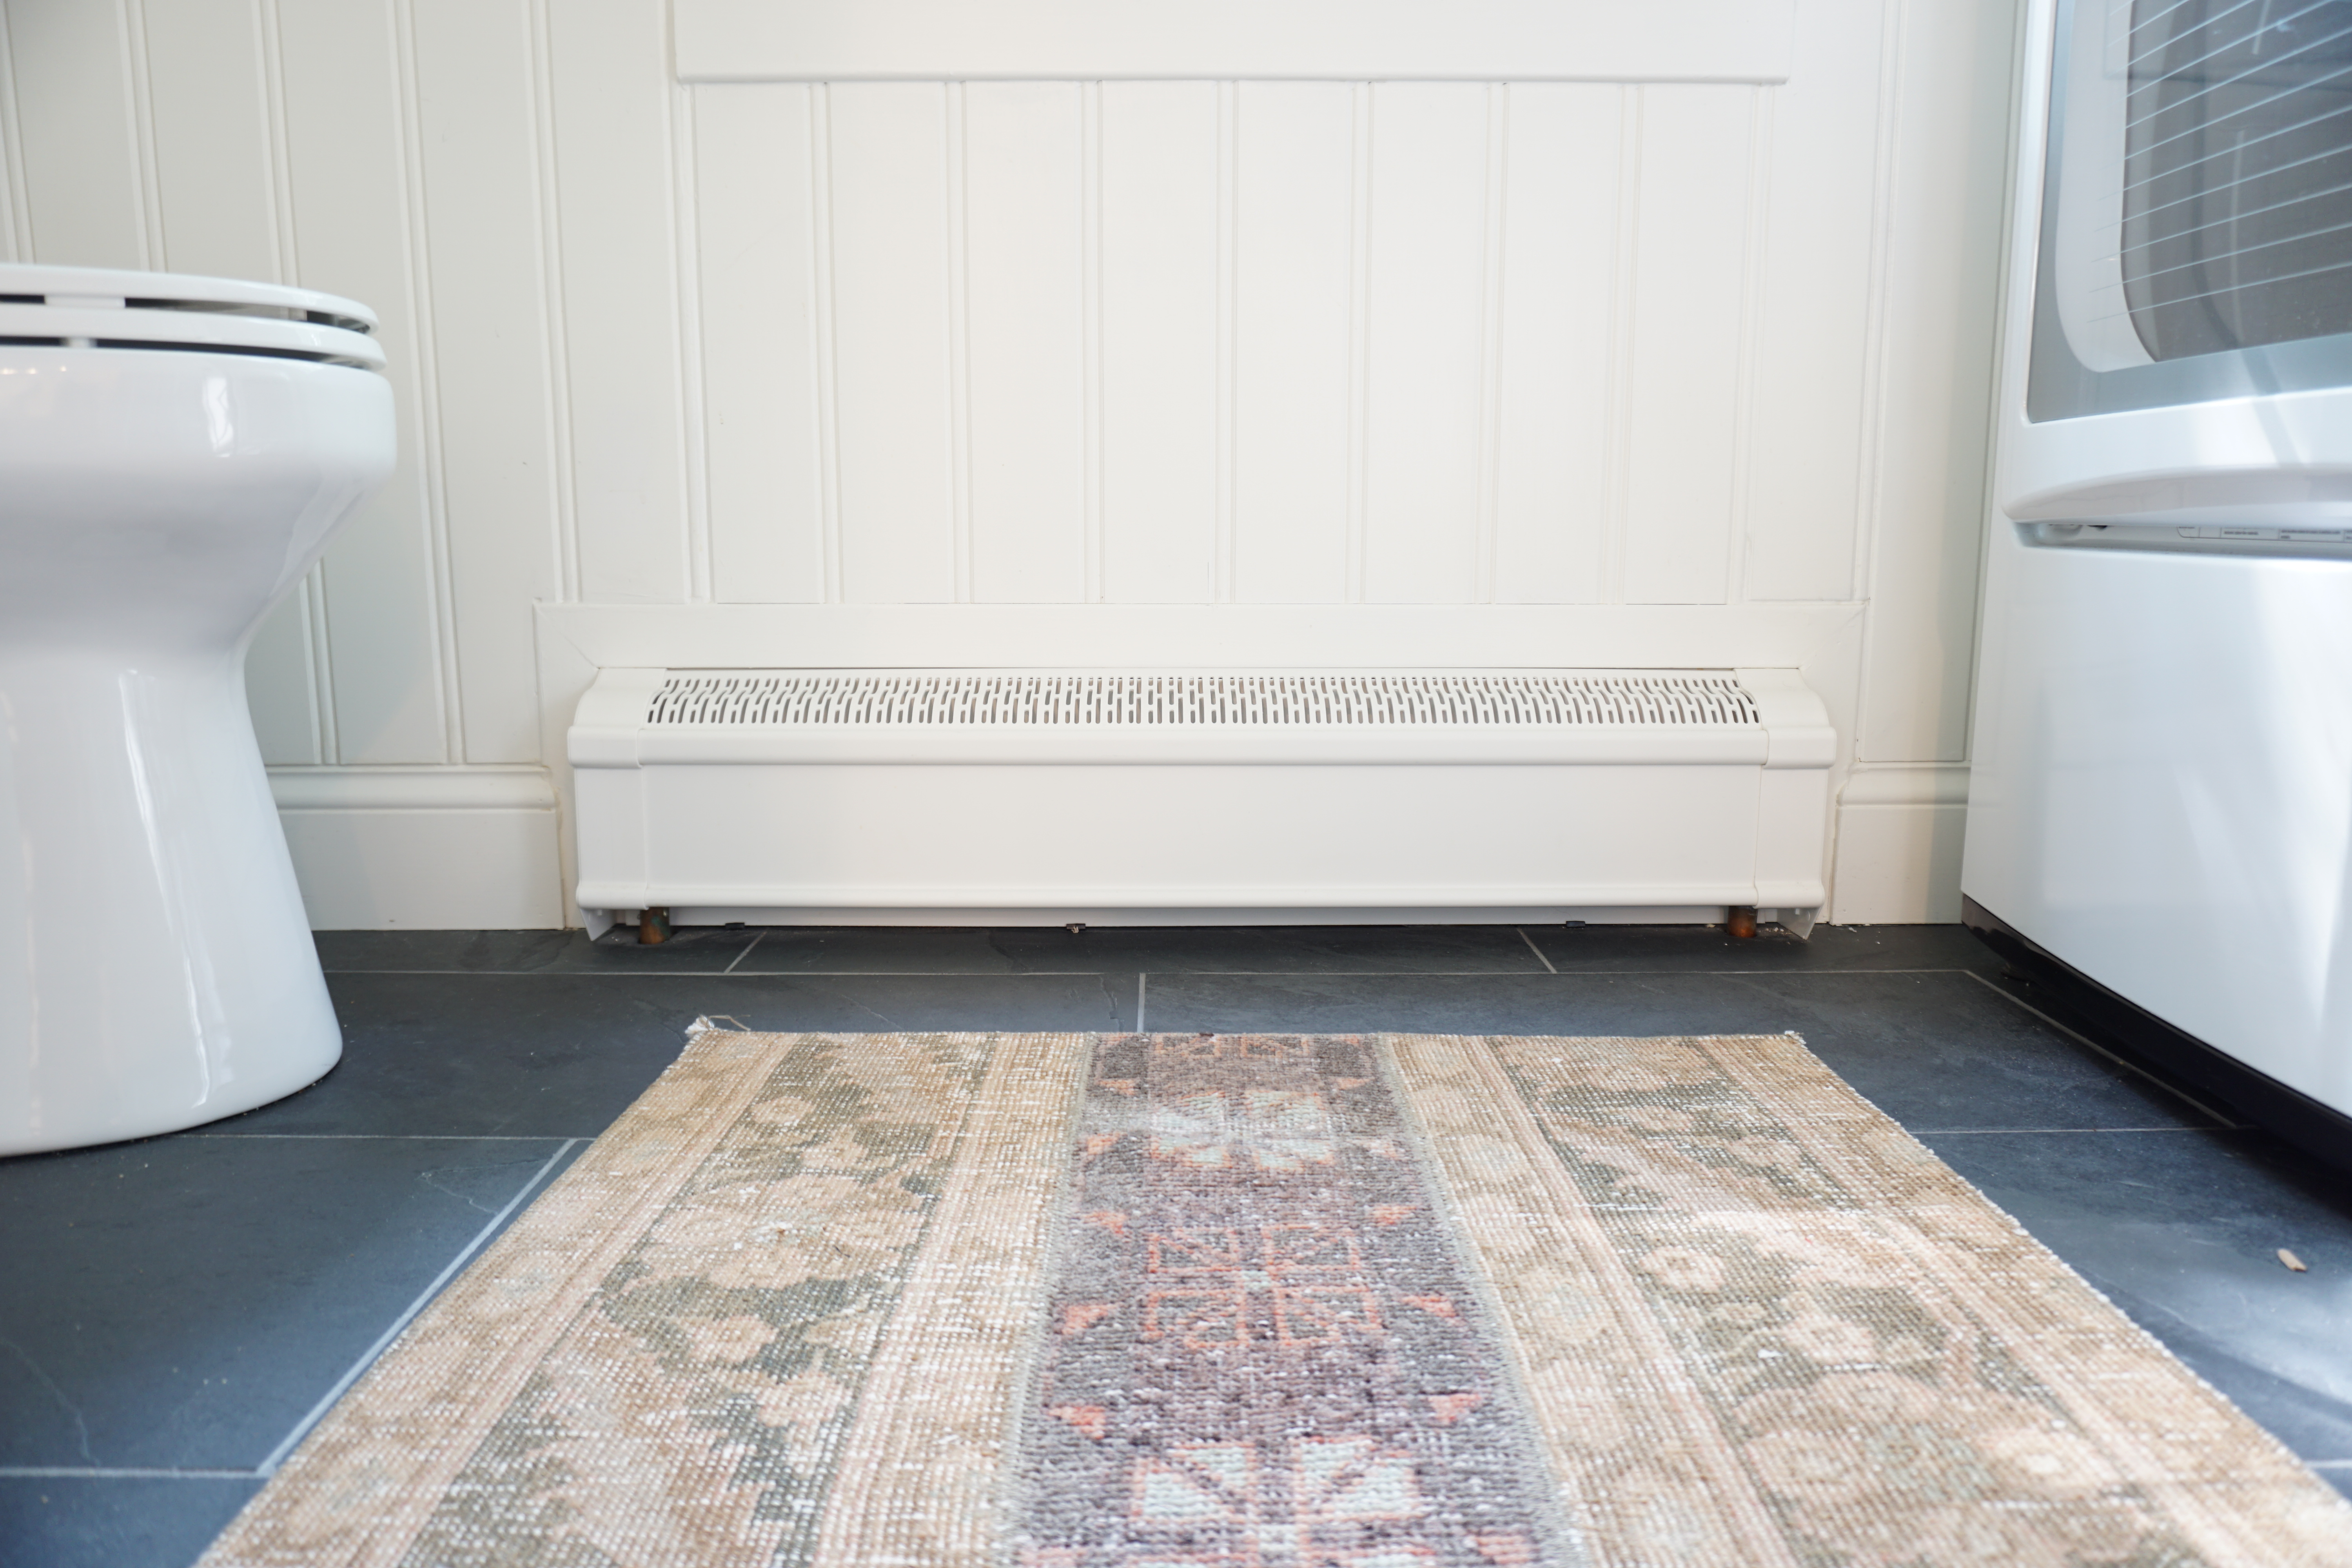
Next, we replaced the old dented baseboard heater cover with this cover from Cover Luxe. The Cover Luxe cover is a decorative but functional heater cover that blends more seamlessly with baseboards and trim (No, this is not sponsored. I wish!). If you live in a location with primarily baseboard heat, you probably know the struggle of dealing with heaters and trying to furnish your home around them. We were thrilled to find something that was not an eyesore. Note – we have water-based heat, so please take that into account if you have electric baseboards as these may not be compatible.

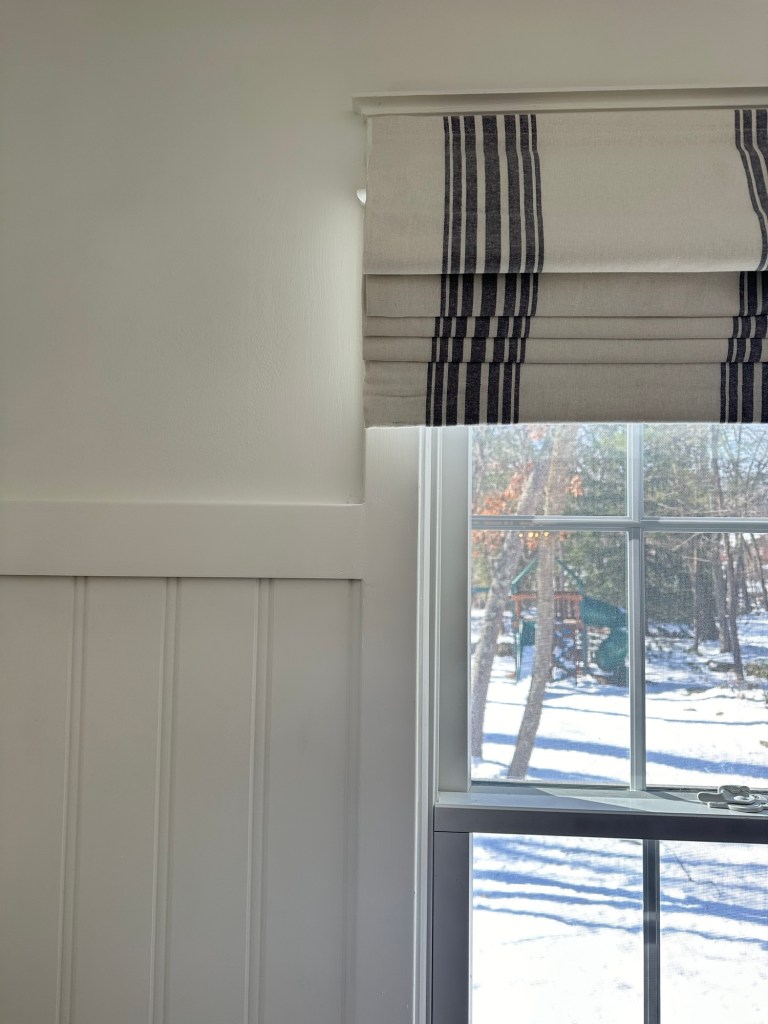
One of my favorite changes in this room is the trimwork. We added a wide beadboard throughout the room, about 2/3 the height of the room. I got the idea for the wide trim from Nina Hendrick’s mudroom (I highly recommend you check out her site if you enjoy New England decor). It is almost a hybrid between traditional beadboard and vertical shiplap. We also replaced the baseboard and window trim with a more substantial craftsman style trim, and we trimmed out the baseboard heater. All of the trim was painted Benjamin Moore Simply White in a satin finish. The walls were painted Simply White in an eggshell finish.

We decided to add the same beadboard to the wall outside of the bathroom to add visual interest. (I’m hoping to do more with this space, but I am not sure exactly what yet).


There are some small changes that took more brainwork than you’d think, and which are not necessarily noticeable at first glance. For instance, we took the opportunity to upgrade electric (to current code standards) by replacing the outlet. We also lowered the exhaust vent so we no longer had to see the unsightly metal tube peering over the dryer. We swapped the large protruding vent duct with a smaller profile dryer duct connector.
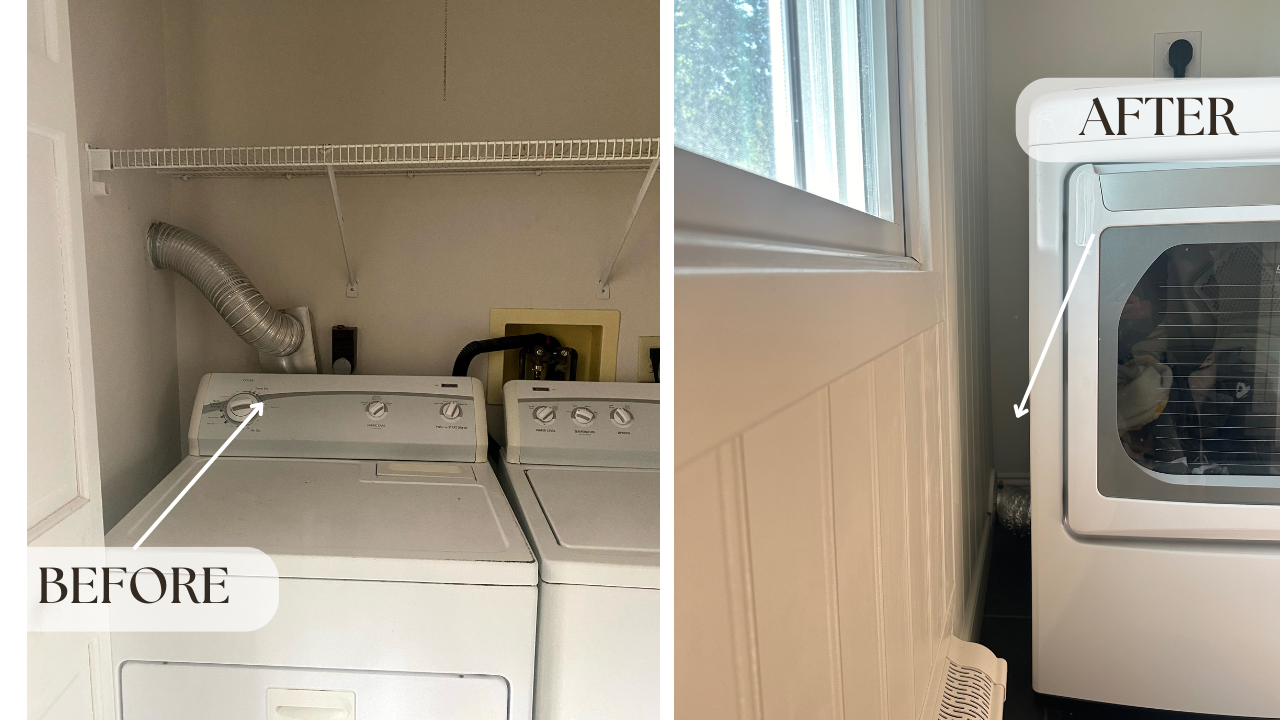
This new connection allows us to move the dryer or unhook the vent for cleaning by snapping out the removable connection piece. No tools needed!
Moving on, we upgraded the vanity, counter, and fixtures. In my perfect world, I would have had a custom vanity built with matching cabinets, but that was not in the budget. So, we pivoted a bit. Our solution was to order the cabinets and vanity online and assemble it ourselves.
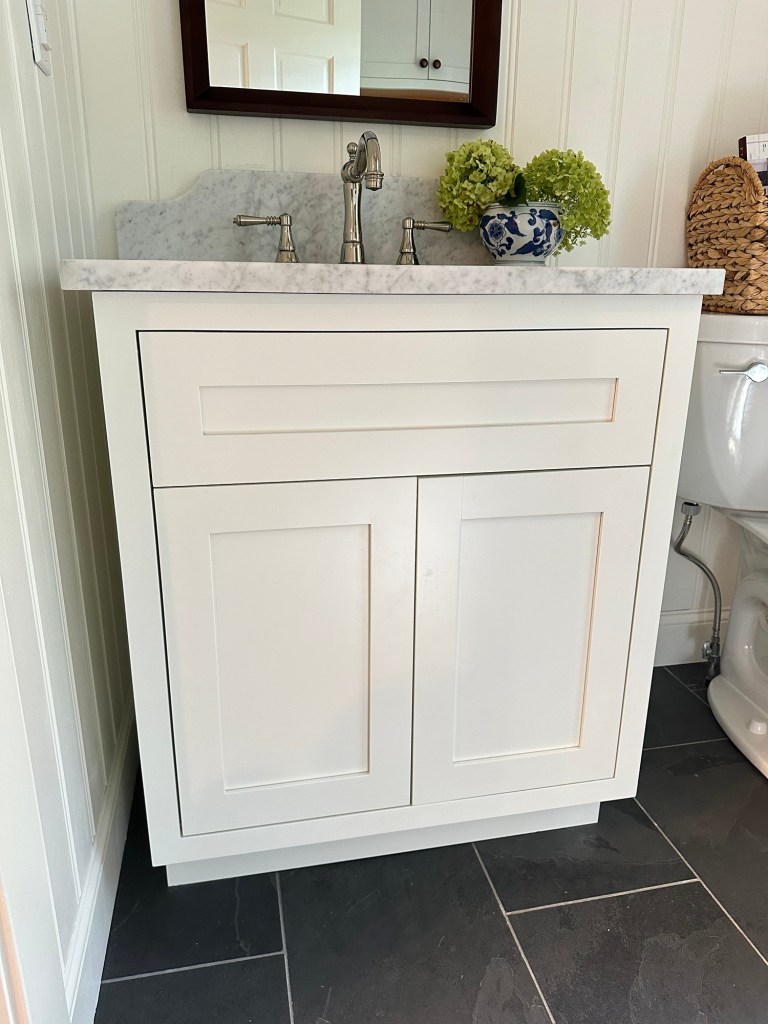
We found a honed carrera marble remnant from a local stone yard. By saving money on the stone, we were able to splurge a little bit on a custom backsplash design.

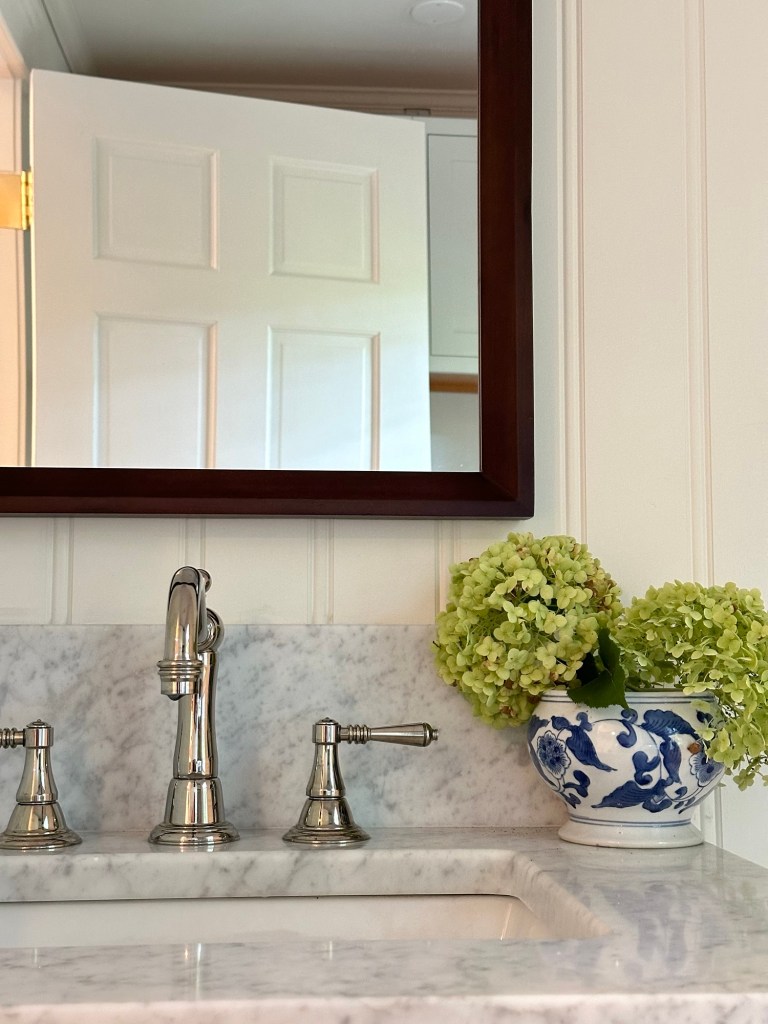
In all honesty, I was very much looking forward to replacing the existing faucet and lighting, and the old mirror that had rusted on the edges. The faucet knobs were missing cap pieces, and it was time to retire them. Instead of using satin nickel again, we went with polished nickel fixtures. Polished nickel has been my favorite finish for a few years now. Shiny but warm, I simply love it. We choose the Brizo Tresa faucet– substantial and classic. We replaced the square bezel mirror with an arched walnut mirror. I like the contrast and warmth that it adds.
Coffee finished yet? Good. We have a few small finishes left, such as door hardware, patching a few nail holes, some decor, and maybe even wallpaper. But for now, the space is functional and great improvement.
Sources:
Tile – available here
Grout – available here
Dryer Vent Duct Connector – Link; Similar available on Amazon here
Cabinets – maplevilles vanity and cabinets, available here
Faucet – available here; similar less expensive option on Amazon here
Lighting – Pottery Barn Mercer, link
Rug – Etsy, similar here
Mirror – here
Disclaimer – Some links in my posts may be affiliate links
XOXO
-Paige
